Step-by-Step Guide: How to Embroider on Crochet for Stunning Designs
Welcome to the enchanting world of combining two timeless crafts: crochet and embroidery. If you've ever marveled at the intricate designs on crochet work and wondered how to add such stunning details to your projects, you're in the right place. This article is your comprehensive guide to embroidering on crochet, a technique that elevates crocheted items' aesthetic appeal and uniqueness.
Why Embroider on Crochet?
Embroidering on crochet pieces is a creative technique that enhances crocheted items' aesthetic appeal and uniqueness. This practice allows for adding intricate details, personalized designs, and vibrant colors that might be difficult to achieve with crochet alone. Crafters can create multi-dimensional projects that stand out by combining the texture of crochet with the precision of embroidery.
This method is particularly popular for embellishing finished items, such as floral patterns on crocheted bags, names on hats, or decorative borders on blankets. The primary goal of embroidering on crochet is to elevate crocheted creations' visual and tactile qualities. This technique adds value to the finished product, allows artisans to express their creativity, and distinguishes their work in a crowded marketplace.
Adds Unique Details to Projects
Embroidering on crochet infuses projects with unique details that set them apart. This combination of crafts allows for the creating of intricate patterns and designs that are difficult to achieve with crochet alone. Whether it's adding delicate floral motifs to a crocheted bag or intricate borders to a blanket, embroidery introduces a level of detail that enhances each piece's overall appearance and uniqueness.
This technique enables crafters to transform ordinary crocheted items into bespoke works of art, adding a unique personal touch.
Personalizes Gifts and Items
Embroidery on crochet offers a fantastic way to personalize gifts and items, making them more meaningful and memorable. Crafters can create personalized keepsakes that recipients will treasure by adding embroidered names, dates, or special messages to crocheted gifts. This approach is perfect for customizing hats, scarves, and baby blankets, providing a thoughtful touch that shows the recipient how much they are valued.
Personalized embroidered crochet items are unique and convey a sense of warmth and thoughtfulness that mass-produced items cannot match.
Enhances Texture for Visual Interest
The addition of embroidery to crochet projects significantly enhances their texture, adding depth and visual interest. The juxtaposition of embroidered stitches on the crocheted surface creates a multi-dimensional, tactile, and visually appealing effect. This enhanced texture elevates the item's aesthetic quality and invites touch, making the piece more engaging and enjoyable.
From a design perspective, combining crochet and embroidery offers endless possibilities for exploring texture and color. It allows crafters to experiment and push the boundaries of their creativity.
What Materials are Needed?
A few essential materials are required to embroider on crochet. Embroidery floss or thread is the cornerstone, offering a palette of colors to bring your designs to life. A sharp, thin embroidery needle is crucial for piercing the crocheted fabric without causing damage.
Embroidery Floss or Thread
Embroidery floss or thread adds color and detail to crochet projects. Available in a wide range of colors, it allows for the creation of intricate designs and personal touches. Selecting high-quality floss or thread can significantly impact your embroidered work's final look and durability.
Sharp, Thin Embroidery Needle
A sharp, thin embroidery needle is essential for navigating the crocheted fabric. Its fine point minimizes damage and ensures precision in stitch placement. The right needle makes the embroidery process smoother and more enjoyable, contributing to the overall quality of the design.
Crochet Item as the Base Fabric
Crochet is a unique base fabric for embroidery, providing a unique texture and structure. Choosing the right crochet base can enhance the embroidered embellishments, whether it's a blanket, hat, or bag. The texture of the crochet fabric adds depth and dimension to the embroidery, making each piece distinctive.
Embroidery Hoop (Optional but Recommended)
While optional, an embroidery hoop is highly recommended for keeping the fabric taut during the embroidery process. It helps achieve uniform stitch tension and prevents puckering, ensuring a neat and professional finish. A hoop can also make the process more manageable, especially for beginners.
How to Choose a Design?
Choosing the right crochet embroidery design involves considering the project's purpose and base texture. Choose designs that reflect the recipient's interests or incorporate meaningful symbols and dates for personalized gifts. For decorative pieces, select patterns that complement the item's use and aesthetic, such as floral motifs for a spring blanket or nautical themes for a beach bag.
Additionally, the complexity of the design should match your embroidery skill level; beginners might start with simple shapes and lines, while more experienced crafters can tackle intricate landscapes or portraits. Lastly, consider the color contrast between the embroidery floss and the crochet base to ensure your design stands out beautifully.
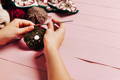
Preparing the Crochet Item
Before beginning the embroidery process, it's crucial to properly prepare the crochet item to ensure the best possible outcome. Start by inspecting the crochet fabric for any loose ends or inconsistencies that may affect the embroidery. If using a hoop, gently stretch the crochet into it, ensuring it's taut but not distorted.
This step helps maintain an even surface for stitching. If necessary, wash and dry the item to remove any oils or residues affecting the embroidery floss. Planning your design placement is also key; mark the design lightly with a washable marker or tailor's chalk to guide your stitching.
Proper preparation sets the foundation for a smooth and beautifully finished embroidery process.
Basic Embroidery Stitches for Crochet
Mastering a few basic embroidery stitches can significantly enhance the detail and texture of crochet projects. The running stitch is ideal for outlining designs or adding fine details, offering a simple yet effective technique for beginners. The satin stitch fills larger areas with color, creating a smooth, dense texture that contrasts beautifully with the crocheted background.
The texture and depth are perfect for additional centers or dotted accents. Lastly, the chain stitch mimics the appearance of crochet stitches, blending seamlessly with the crochet fabric while outlining shapes or adding decorative borders. These foundational stitches offer a versatile toolkit for embellishing crochet items, allowing for endless creativity and personalization.

Step-by-Step Embroidery Process
Embroidering on crochet follows a step-by-step process to ensure precision and beauty in the finished project. Begin by transferring the design onto the crochet fabric using a washable marker, ensuring it's visible but not permanent. Prepare your embroidery needle with the chosen thread, starting with a knot at the end to secure the floss.
Transferring the Design with Washable Markers
The first crucial step is to transfer the design onto your crochet item with washable markers. This ensures that your embroidery follows the intended pattern accurately. Use light strokes to keep the design visible without leaving permanent marks.
This method allows for adjustments before the stitching begins, ensuring the final embroidery reflects your vision.
Knotting and Starting Thread Without Bulk
To start, knotting and threading your needle without creating bulk is essential. A small, secure knot prevents the thread from slipping through the fabric while ensuring it's not too large to cause a noticeable lump. Begin stitching close to the knot to keep the back of the work tidy and prevent any loose ends from interfering with the design.
Following the Pattern with Consistent Stitch Length
Consistent stitch length is crucial for the overall appearance of your embroidery. It contributes to a uniform texture and pattern clarity. Follow the transferred design closely as you stitch, maintaining even spacing between stitches.
This precision creates a polished and professional-looking finish.
Securing Thread Ends Neatly on the Back
Finally, securing the thread ends neatly on the back of the crochet item ensures the durability of your embroidery. After completing a section or changing colors, weave the thread ends through the backside stitches before trimming any excess. This method prevents unraveling and keeps the back as neat as the front, extending the life of your embroidered piece.
Tips for Successful Embroidery
For successful embroidery on crochet, practice on scrap fabric first to get comfortable with the stitches and see how the colors interact with your base material. Choosing the correct needle is crucial; a thin, sharp needle will make your work easier and more precise. Select high-quality embroidery floss to ensure your project looks vibrant and lasts longer.
Maintain even tension on your thread to prevent puckering and achieve a smooth finish. Take time with each stitch, as rushing can lead to mistakes and uneven work. Lastly, stay patient and flexible; embroidery is an art that improves with practice, and each project teaches you something new.
These tips will enhance your embroidery experience and lead to beautifully finished projects.
Common Mistakes to Avoid
Avoiding common mistakes can significantly improve the quality of your crochet embroidery. One key error is too much tension, which can pucker the fabric and distort the design. Conversely, loose san stitches lead to sagging embroidery that doesn’t stay in place.
Choosing the wrong size needle can damage the crochet fabric or make it difficult to pull the thread through. Neglecting to secure thread ends properly can cause your work to unravel over time. Additionally, skipping the step of transferring your design can lead to uneven and misplaced stitches.
Finally, using low-quality thread may cause your project to fade or break easily, diminishing its longevity. Being mindful of these pitfalls will help ensure that your embroidery enhances your crochet work and lasts for years.
How to Care for Embroidered Items
Proper care of embroidered items ensures their longevity and preserves their beauty. Wash embroidered items gently by hand or on a delicate cycle in a washing machine with mild detergent. Avoid harsh chemicals like bleach, which can damage the embroidery threads.
Lay flat to dry to prevent distortion; avoid wringing or twisting the fabric, which can stretch the crochet and embroidery out of shape. If ironing is necessary, use a low heat setting and place a protective cloth between the iron and the embroidery to prevent scorching. Store embroidered items in a cool, dry place, and avoid folding them directly on the embroidered sections to prevent creases.
Following these care instructions will help maintain the intricate details and vibrant colors of your embroidered crochet items.
